Timed events
We are going to stop working with shift registers for a bit. So please disconnect the first shift register’s data pin from the Arduino’s pin 10, and instead connect the data pin to ground. Do not put the Arduino’s pin 10 to ground. Leave that unconnected.
Now, we are going to learn about timed events. This is a way to prepare a script for a sequence of things to happen in the future at definite times, and then trigger them to start happening.
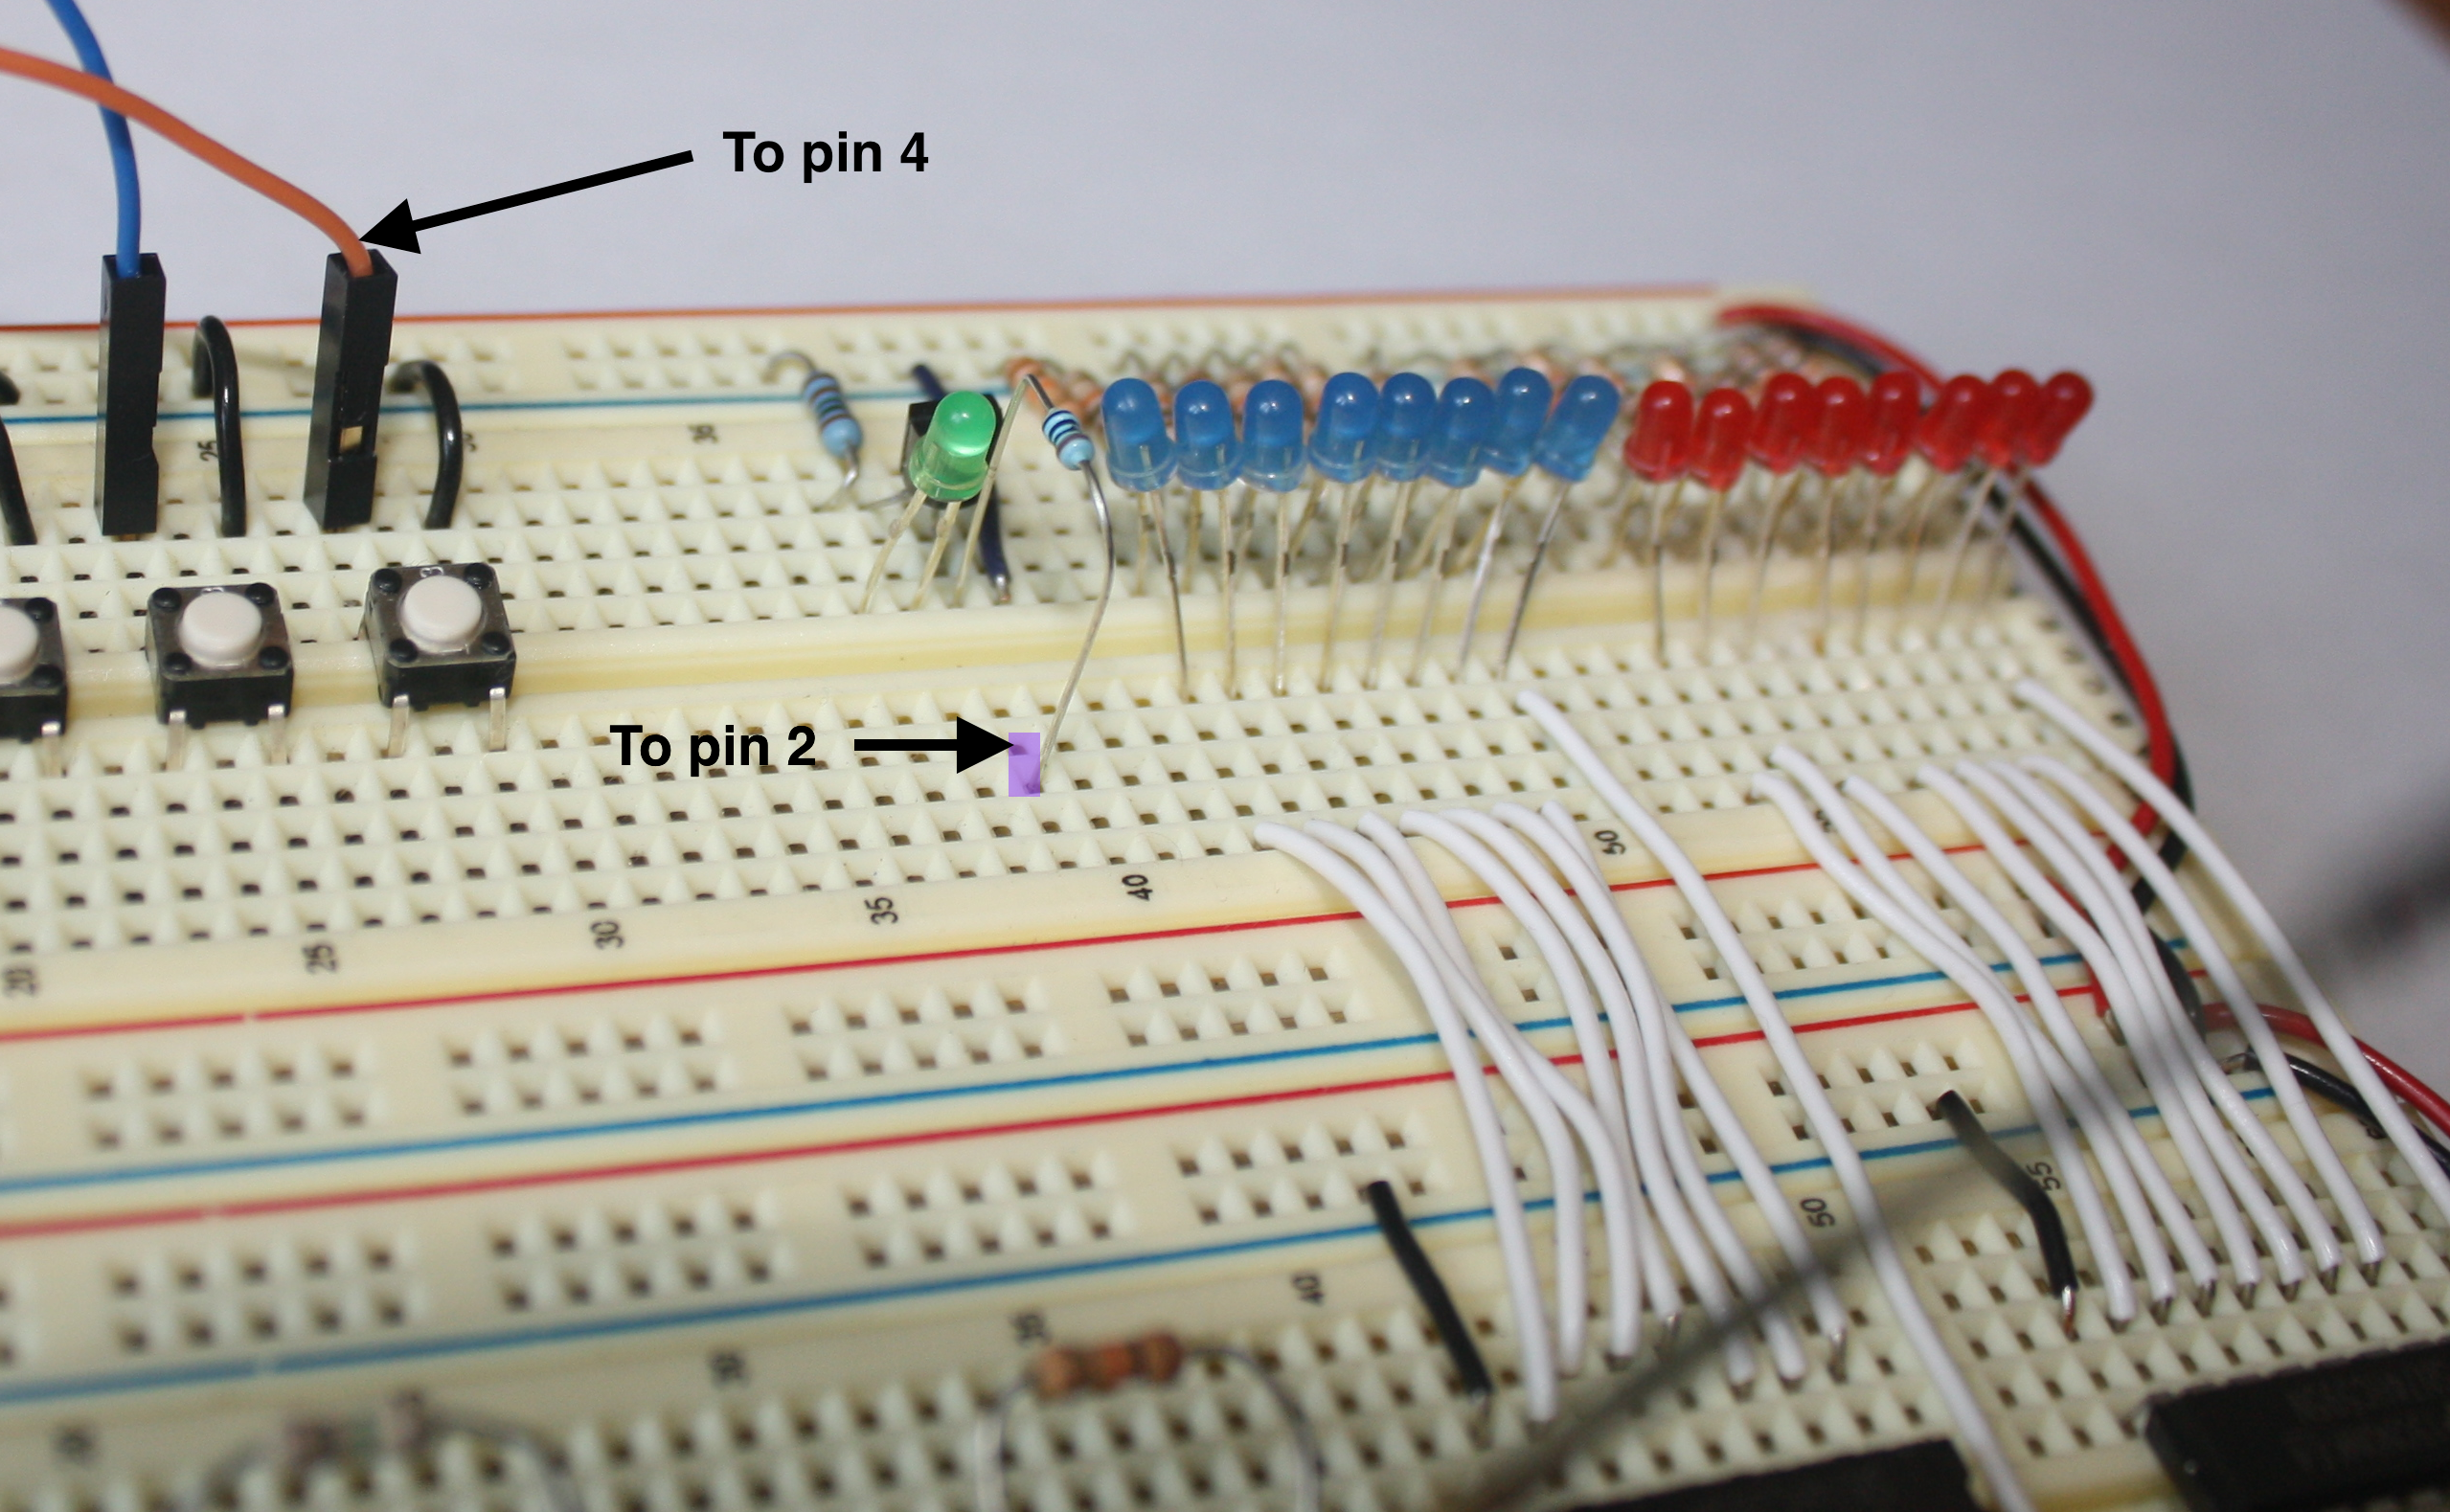
Connect one of the breadboard buttons to pin 4, and the green LED to pin 2 as shown:
Now upload the timed-events sketch.
Try pressing the button, and watch what the LED does. It is blinking morse code. Do you know what it is saying?
Try pressing the button again. If you press the button before the sequence is over, it will start over.
CHECKPOINT!
Inside the program, we are declaring a new object called a timed event:
void blinkmyled(int);
Pb_timedevent dothis(blinkmyled);
We are calling our timed event dothis. But you can give it any
name you want. We are also supplying it with the name of a function
(in this case, blinkmyled. You have to supply all timed events
with the name of a function that returns type void and takes an int as an argument. Look further below in the code, and you will
see that void blinkmyled(int val) is indeed defined this way.
Whew! That was a mouthful. What this means is that the function blinkmyled will be instructed to run with specific timing. Imagine I ask you to clap your hands once every two seconds. Now I ask your partner to stomp one foot every two seconds. In both cases, you are using the same timing (once every two seconds), but one person is running the function claphands while the other person is running the function stompfeet. The event is when I tell you to start running those functions with those timings. Maybe I’d call the events youdo or theydo. Then I would define the timed events and functions Pb_timedevent youdo(claphands) and Pb_timedevent theydo(stompfeet). But I could just as easily have both of you clap. I would just need to change the events to Pb_timedevent youdo(claphands) and Pb_timedevent theydo(claphands).
Every time you define a timed event, it is important to declare the function along with it, as was shown above (you need the void blinkmyled(int) in order to use the blinkmyled function in that timed event).
Onward to the loop! Inside loop(), you will see the line:
dothis.update();
All timed events declared in the program have to be updated by calling
the update() functions for each of them inside loop().
The timed sequence that we are calling is being done like this:
dothis.start(values, timing, 18);
The first argument values is an int type array. See before setup() how it is being defined. This can be any type of int array. We are only using zeros and ones in it for our use.
The second argument is timing, and is an array of time periods
(in milliseconds). This controls for how long each step in the event
lasts.
The third argument is the length of the sequence. This should not be larger than the size of the arrays (18). But it can be smaller.
- Try changing 18 to 6. What sequence is the button press triggering now?
- Try changing the first 6 bits inside
values[]beforesetup(). Are you able to change the blink pattern? - Try changing the first 6 timing entries inside
timing[]beforesetup(). Is this taking effect?
CHECKPOINT!
Remember, the timed event does not have to be about blinking LEDs. You
can call any function you want, and make it do whatever you want at
specific times. All that is required is for the function to be of type void, and for it to accept an int variable as input.